Follow us on
At Old World Sourdough & Gluten Free Baking, we celebrate the art of baking with a focus on traditional sourdough techniques and innovative gluten-free recipes and flour blends.
Join us on a delicious journey where flavor meets health, and discover the joy of creating wholesome baked goods from the comfort of your kitchen.
Gluten-Free Sourdough Pie Crust
This gluten-free sourdough pie crust is buttery, flaky, and tender. Brushing it with an egg wash makes it perfectly golden brown on the outside while keeping the inside soft and flaky.
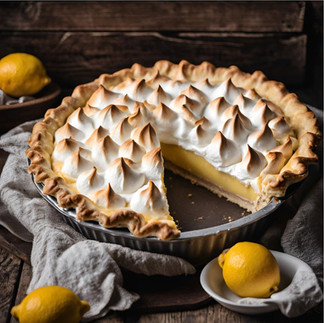
This versatile pie crust is suitable for both savory and sweet recipes, making it an excellent addition to any home cook's repertoire. For savory dishes, consider filling it with a hearty mixture of seasonal vegetables, cheeses, and proteins, creating a comforting quiche or pot pie that is sure to impress. On the sweeter side, this crust pairs beautifully with fruit fillings, custards, or chocolate ganache, lemon meringue allowing for the creation of delectable desserts that cater to gluten-sensitive diets without compromising on flavor or texture.
Get ready to indulge in a delightful baking experience! You have the exciting option to create:
- Full-Size Pies: Perfect for sharing with family and friends!
- Mini Pies: Ideal for individual servings or as a sweet treat for gatherings!
- Hand Pies: Convenient and delicious, perfect for on-the-go enjoyment!
Gluten-Free Sourdough Pie Crust
Prep Time:
20 Minutes plus 20 Minutes (minimum) chill time
Cook Time:
40 Minutes or per Pie recipe
Serves:
2 - 9" crusts
Ingredients
Ingredients:


Equipment:
Mini Pie Tins or Mini Tart Pan or Hand Pie Press (Optional for mini or hand pies)
Parchment Paper
Ingredients:
2 ½ cup high quality gluten-free all purpose flour containing xanthan gum.
I use my All-Purpose Blend or Cup4Cup Multi Purpose Blend.
Do not use flours with chickpea/garbanzo bean flour.
1 cup cold gluten free sourdough discard
16 tbsp cold unsalted butter (cubed)
2 tsp freshly-squeezed lemon juice or vinegar (helps with flakiness)
4-10 tbsp milk, or dairy-free milk (do not add all at once!)
1 tsp granulated sugar
1 tsp sea salt
Egg Wash - 2 eggs and 2 Tablespoons milk beaten together
Preparation
Place the gluten-free flour, sugar, and salt in a large mixing bowl. Whisk them together until thoroughly combined.
Add the cubed, cold butter and use a dough cutter to blend the butter into the flour until it resembles small peas.
Combine the discard, lemon juice, and 1-2 tablespoons of milk, using a fork to blend into large crumbles. Then, use your hands to press the dough together until all dry bits are incorporated. If needed, add more milk, one tablespoon at a time, until the dough forms a ball or disc. 4-6 is the norm but this can vary depending on flour, altitude, etc.
Wrap the dough in plastic wrap and refrigerate while preparing the pie filling. Chill for at least 20 minutes, or up to 2 hours - overnight, for up to 3 days.
Recommendation: For a tastier dough, try chilling it overnight. This slow fermentation adds a nice sour kick that works great in savory dishes like quiche or a pot pie as well as enhancing a fresh discard. The extra tang works well with sweet pies, like cherry or blueberry. But if you're making rich desserts like chocolate or lemon pies, skip the overnight chill for a smoother flavor.
After the dough has chilled:
If making mini pies or hand pies, use a dough cutter to divide the disc into sections (cut into 8 for 8 mini pies). If making a 9" cut in half for a top and bottom crust (or 2 bottom crusts) .
Place a piece of parchment paper on the counter, set the disc or a section of dough on top, and cover with another piece of parchment paper. Use a rolling pin over the parchment paper to flatten and roll out the dough to the desired width, preferably ¼-inch to 3/16th of an inch thick. The parchment paper prevents sticking to the rolling pin or counter and makes it easy to transfer the rolled-out dough to the pie pan.
Remove the top piece of parchment paper and put it aside. Use the bottom piece of parchment paper to flip the pie crust into a lightly greased pie pan. Neatly trim the edges along the sides of the pie dish. Use your thumbs or a fork to create design.
Repeat with any remaining dough sections.
Brush with egg wash before baking.
Follow your pie recipe for baking instructions.
Tent the edges with foil if the crust begins to brown too much to prevent burning.
Notes:
Pot pies typically require only a top crust, while quiches need just a bottom crust. Pre-bake the bottom crust for quiche for 12 minutes prior to adding the filling. Use a fork to prick the bottom to prevent it from rising.
Storage Instructions: Keep at room temperature or in the refrigerator based on your pie recipe. For example, quiche or meat pot pies need refrigeration, while some fruit pies can be kept at room temperature. If refrigerating your pie, it's recommended to reheat it in the oven at 350 F to restore its crispiness and flakiness. Cover with foil if the pie crust starts to brown excessively.
Freeze unbaked pie crust in the freezer for up to 3 months. Thaw in refrigerator overnight before rolling out.